
how to measure for drapery is simpler than most people think, but small mistakes can change how the final result looks. To get it right, you need to understand drapery length, drapery panel widths, and how measuring for drapery rods affects the final fit. This guide explains everything step by step in clear, easy language. It is written from real experience, focuses on practical advice, and helps you feel confident before you buy or install drapery. By the end, you will know when to measure on your own and when professional help makes sense.
Why Accurate Drapery Measurements Matter More Than Most People Think
Drapery does more than cover a window. It helps control light, adds privacy, and changes how a room feels. When measurements are off, drapes can look short, narrow, or uneven. Even a small error can make a tall room feel smaller or a wide window look crowded.
Accurate measuring saves time and money. It helps you avoid returns, fabric waste, and frustration. Well measured drapery hangs straight, opens and closes smoothly, and frames the window in a clean way. Good measurements also make installation easier and help the drapery last longer.
Many homeowners think measuring is just about grabbing a tape and writing down numbers. In reality, it involves planning. You need to think about rod placement, fabric fullness, and where the drapes should end. Getting this right from the start creates a polished look that feels intentional, not rushed.
What Homeowners Should Know Before Measuring for Drapery
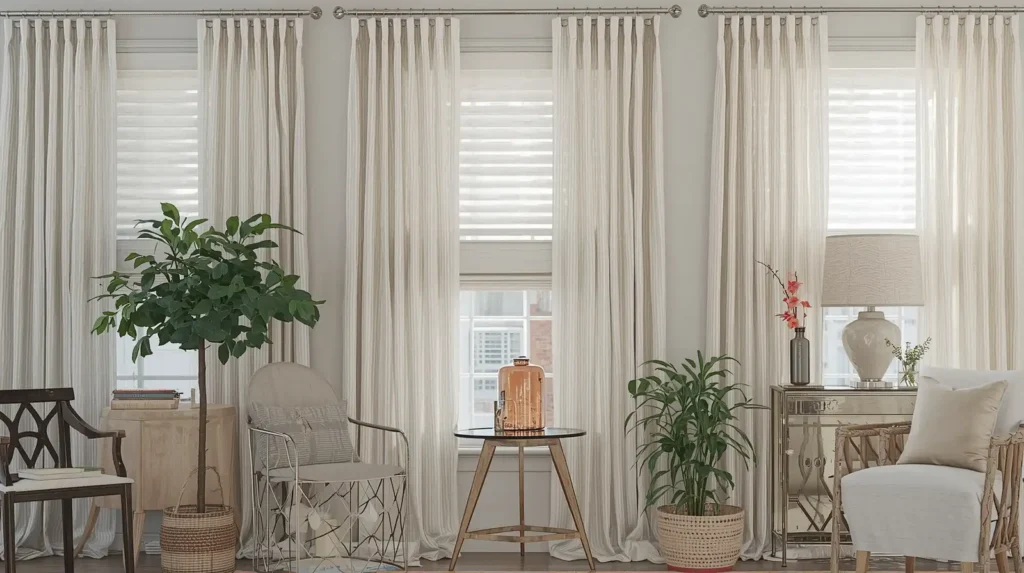
Before measuring, it helps to slow down and understand what you are measuring for. Drapery is different from basic curtains. It usually hangs higher and wider than the window to create a softer, fuller look.
You should decide a few things first. Think about whether the drapes will be decorative, functional, or both. Decide if they will open and close every day or stay mostly in place. These choices affect both width and length.
It also helps to know that most drapery measurements are taken from the rod, not the window frame. Many mistakes happen when people measure the glass only. Drapery is meant to frame the window, not sit inside it.
Having a clear plan makes measuring easier and helps avoid second guessing later. Once you understand the basics, the process becomes much more simple and predictable.
Understanding Drapery Length and How It Impacts the Look of a Room
Drapery length plays a big role in how a room looks. Short drapes can feel casual, while longer drapes often look more finished and elegant. The right length depends on the style you want and how the room is used.
Common options include sill length, apron length, floor length, and puddled length. Sill length stops at the window sill and works well in kitchens or bathrooms. Apron length falls a few inches below the sill. Floor length drapery reaches just above the floor and is the most popular choice for living spaces.
Some people choose puddled drapery, where the fabric rests on the floor. This look works best in formal rooms where drapes do not open often. Measuring carefully is important here, since extra fabric is part of the design.
When measuring drapery length, always measure from the rod down, not from the window. This ensures the fabric falls correctly once installed.
Drapery Panel Widths Explained in a Way That Actually Makes Sense
- Match panel width to fabric type
Heavier fabrics usually need more width to hang smoothly. Lighter fabrics may need less, but still require enough coverage to avoid gaps. - Start with the full width of the curtain rod
Drapery panel widths should be based on the rod length, not just the window. Measuring the rod gives better coverage and helps the drapes frame the window properly. - Plan for enough fullness
Drapes look best when they are wider than the window. A common approach is choosing total panel width that is about twice the rod width so the fabric forms soft, even folds. - Understand that one panel is rarely enough
Most windows need more than one panel on each side. Using multiple panels helps balance the weight of the fabric and improves how the drapery opens and closes. - Check the width of each individual panel
Panels come in standard sizes. Always add up the total width of all panels to make sure they cover the rod fully without pulling tight. - Think about how the drapes will look when closed
Drapery should still look full and relaxed when closed. If the panels barely meet in the middle, the window can look unfinished.
How to Measure for Drapery the Right Way From Start to Finish
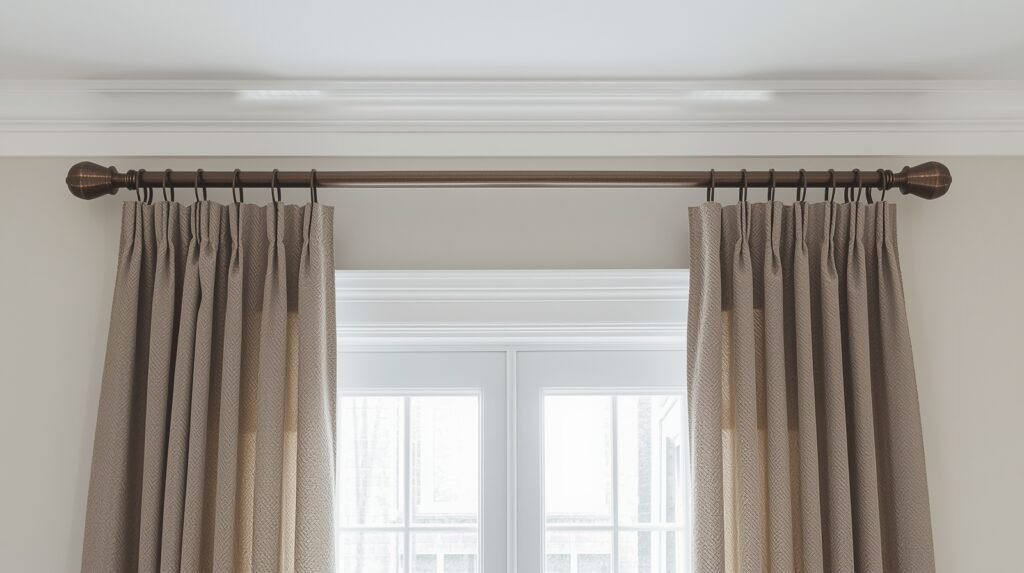
This is the core process. Start by installing or planning the curtain rod. The rod should extend several inches past each side of the window so the drapes can open fully without blocking light.
Measure the rod width from end to end. This number helps you decide how many panels you need and how wide they should be.
Next, measure the length. Measure from the top of the rod down to your chosen stopping point. This might be the sill, below the sill, or near the floor. Measure twice to avoid errors.
Write down all measurements clearly. Double check them before ordering. This simple, careful approach answers how to measure for drapery in a way that works in real homes, not just on paper.
Measuring for Drapery Rods and Why Rod Placement Comes First
Measuring for drapery rods is an important step that often gets skipped. Rod placement affects both width and length, so it should come before final measurements.
Most rods look best when mounted several inches above the window frame. This creates the illusion of height. The rod should also extend past the window on both sides to allow the drapes to stack open.
Measure the space above and beside the window to make sure the rod fits without hitting trim or walls. Once the rod position is set, measuring drapery becomes much easier and more accurate.
Good rod placement improves function and style. It helps drapes hang straight and move smoothly, which adds to the overall look and feel of the room.
Common Measuring Errors That Lead to Short or Narrow Drapes
- Not accounting for fabric style
Some fabrics need more width or length to hang properly. Ignoring this can change how the finished drapery looks and moves. - Measuring the window instead of the rod
Drapery should be measured from the curtain rod, not the window frame. Measuring the glass area often results in drapes that look too small once installed. - Ignoring extra width for fullness
Choosing panels that only match the window width can make drapes look flat. Drapery needs extra width so it hangs with soft folds instead of pulling tight. - Forgetting to plan rod placement first
If the rod height changes after measurements are taken, the drapes may end up too short. Rod placement should always come before measuring length. - Measuring length only once
Floors are not always level. Measuring from more than one point helps avoid drapes that look uneven at the bottom. - Rushing through the process
Quick measurements often lead to mistakes. Taking a few extra minutes to double check numbers can prevent costly ordering errors.
How Window Shape and Ceiling Height Change Drapery Measurements
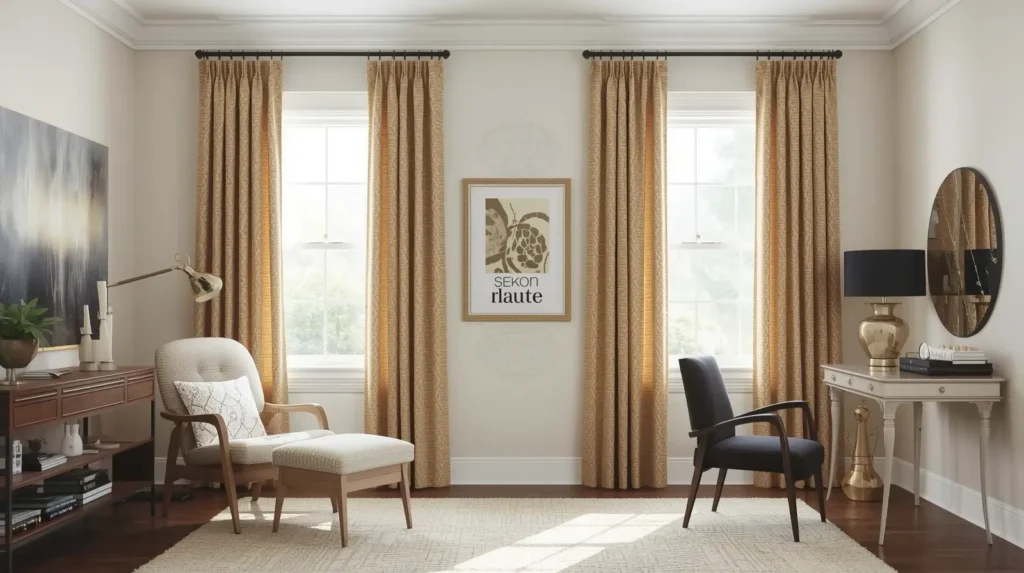
Not all windows are the same. Tall ceilings allow for longer drapes and higher rod placement, which can make a room feel grand and open.
Wide windows may need more panels to maintain fullness. Bay windows and corner windows also require careful planning so drapes move smoothly without gaps.
Low ceilings may benefit from rods placed close to the ceiling to add height. In these cases, accurate length measurement becomes even more important.
Understanding how your specific space affects drapery helps you choose measurements that look balanced and natural.
When Custom Drapery Measurements Make More Sense Than Ready Made
Ready made drapes work well in many homes, but they do not fit every situation. Custom measurements make sense for very tall windows, wide spans, or unique shapes.
Custom drapery also allows more control over fabric, lining, and fullness. This can improve light control and durability.
If measurements feel confusing or the space is complex, custom help can save time and stress. It ensures the final result fits the space instead of forcing the space to fit standard sizes.
Drapery Measurement Tips Trusted by Homeowners in Lewisville, TX
Homeowners in Lewisville, TX often deal with bright sunlight and open living spaces. Measuring drapery with light control in mind helps improve comfort and privacy.
Choosing the right length helps block light without making rooms feel dark. Extra width helps cover windows fully during peak sun hours.
Careful rod placement also helps protect walls and trim. These practical tips come from real homes and real experience, not just design theory.
Drapery Measurement and Installation You Can Trust With TEXAS WINDOWS
Professional support can make the process smooth from start to finish. TEXAS WINDOWS brings experience in measuring, planning, and installing drapery so it fits correctly the first time.
Working with professionals reduces guesswork and helps avoid mistakes that cost time and money. Clear communication and careful measuring lead to results that look clean and feel right for the space.
When installation is done correctly, drapery hangs evenly, moves easily, and lasts longer. This level of care builds trust and confidence in the final result.
Conclusion
Measuring drapery does not have to be stressful. With a clear plan, careful measuring, and an understanding of width, length, and rod placement, you can achieve a polished look that works for your home. Paying attention to details and avoiding common mistakes helps drapery look intentional and balanced. Whether you measure on your own or work with experts, the goal is the same: drapery that fits well, functions smoothly, and enhances the space.
If you want help with accurate measuring and proper installation, TEXAS WINDOWS can guide you through the process with care and experience. Reach out to get answers, avoid guesswork, and make sure your drapery looks right from day one.